- -32%

Email: store@creasol.it - Telegram: CreasolTech - Whatsapp: +393283730010

Priority mail: snel en goedkoop - Express Courie

Neem contact met ons op voordat u producten retourneert!
Slimme wifi-opener op 2,4 GHz waarmee u uw garagedeur, poort of slagboom kunt openen en sluiten met uw smartphone, Android Auto, Google Home en Alexa.
Volledige ondersteuning: de meeste producten zijn door ons ontworpen!
Email: store@creasol.it - Telegram: CreasolTech - Whatsapp: +393283730010
Bestellingen worden binnen 1 werkdag verzonden
Priority mail: snel en goedkoop - Express Courie
24 maanden garantie, eenvoudig retourneren/restitueren
Neem contact met ons op voordat u producten retourneert!
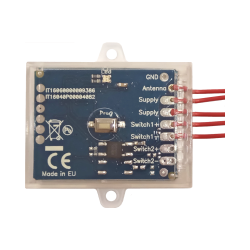
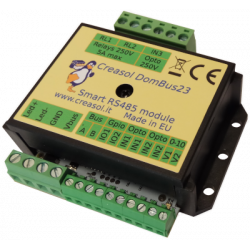
 Zeer compact wifi-apparaat, 39x39x23 mm, uitgerust met een magnetische sensor om de gesloten status te controleren en een potentiaalvrij contact (relais) dat gedurende 0,5 seconde wordt geactiveerd om uw garagedeur, poort of slagboom te openen/sluiten (tegenwoordig "automatisering" genoemd).
De slimme garagedeuropener moet verbonden zijn met het wifi-netwerk thuis: vervolgens kan de automatische bediening via de smartphone zowel binnen het wifi-netwerk als via internet (cloud) worden geopend/gesloten. Op deze manier is het mogelijk om de automatisering op afstand te beheren, ook buiten het wifi-bereik./p>
Geen cloudkosten, geen jaarlijkse kosten.
Wees voorzichtig met elektriciteit. Alle werkzaamheden moeten door technici worden uitgevoerd!
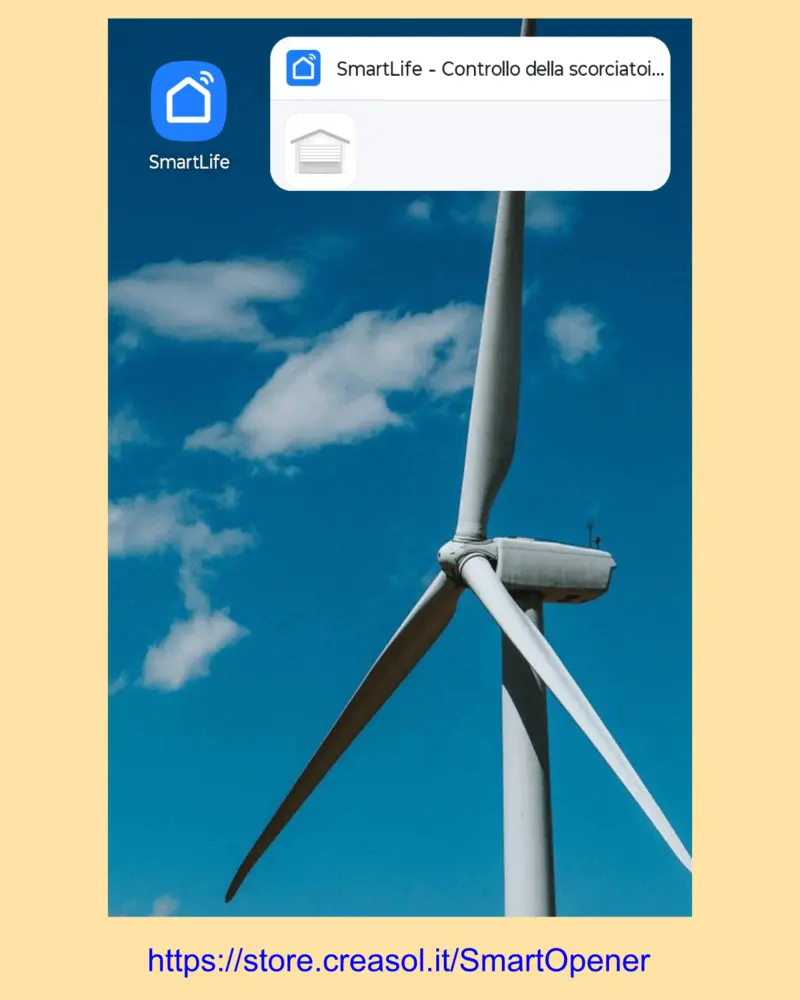
De automatisering kan nu worden bediend via een smartphone en domoticasystemen.
Maak in de SmartLife-app een scène aan om de automatisering te openen (poort, garagedeur of slagboom).
Wanneer de smartphone met het voertuig is gekoppeld, kun je op het app-pictogram tikken -> SmartLife -> Scèneom de automatisering te openen.
Uiteraard is het mogelijk om meerdere slimme openers te installeren voor verschillende automatiseringen, bijvoorbeeld de garagedeur thuis, de slagboom op het werk, enzovoort.
Het gebruik van de plugin https://github.com/lacha07/domoticz-tuya-cloud Het is mogelijk om je te registreren bij de Tuya-cloud, waardoor je toegang krijgt tot de slimme deuropener en deze via Domoticz kan worden aangestuurd via de browser (op pc of smartphone) en de app.
Volg de instructies in de bovenstaande link om je te registreren voor de Tuya API.
Installeer de Tuya-integratie, registreer je bij de Tuya-cloud om een API-sleutel te krijgen, en vervolgens kun je de slimme deuropeners bedienen vanuit Home Assistant.
Nee, het is mogelijk om de magnetische sensor niet te installeren: in dat geval moet u de meldingen voor de open status in de SmartLife/Tuya-app uitschakelen om waarschuwingen over de open status van de automatisering te voorkomen.
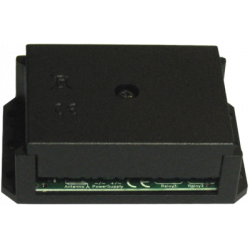
Ja, het heeft een plastic behuizing. Bevestigingsbeugel voor montage op een DIN-rail, met een afmeting van 2,5 modules (43 mm).
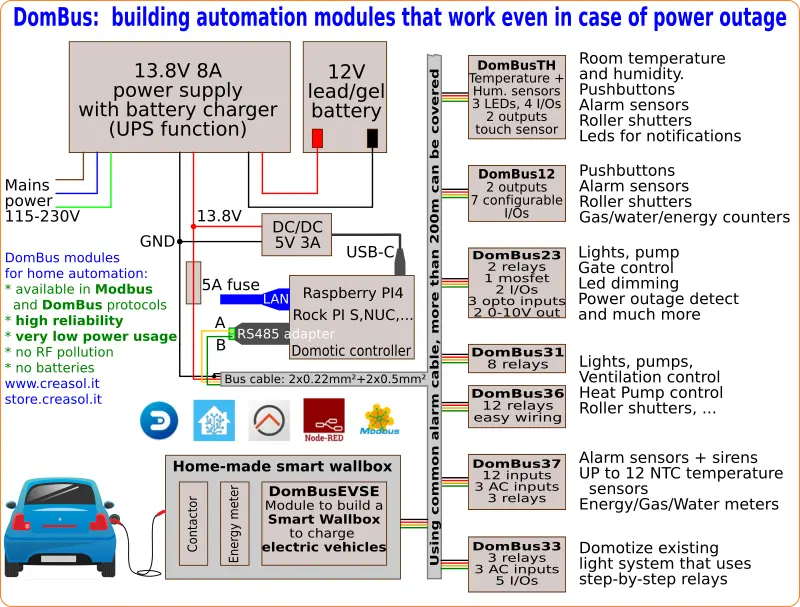
The following video shows a presentation of some domotic modules designed and produced in Italy by Creasol to make a reliable, easy and power-optimized home automation system.
The next video shows our Smart EVSE module that can be used to charge the electric car by using only solar power, or adding 25/50/75/100% of available power from the electrical grid.
Our industrial and home automation modules are designed to be
Modules are available in two version:
Store website - Information website
For our products we can offer FULL SUPPORT and CUSTOMIZATION: please contact us by Email or Telegram
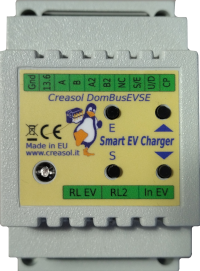 Complete solution to make a Smart EVSE, charging the electric vehicle using only energy from renewable source (photovoltaic, wind, ...), or adding 25-50-75-100% of available power from the grid.
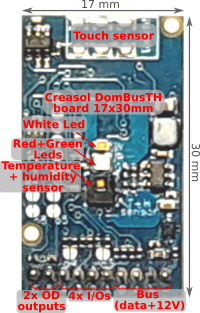 Compact board, 32x17mm, to be installed on blank cover with a 4mm hole in the middle, to exchange air for the relative humidity sensor. It can be installed in every room to monitor temperature and humidity, check alarm sensors, control blind motor UP/DOWN, send notifications (using red and green leds) and activate white led in case of power outage.
Includes:
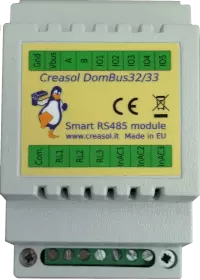
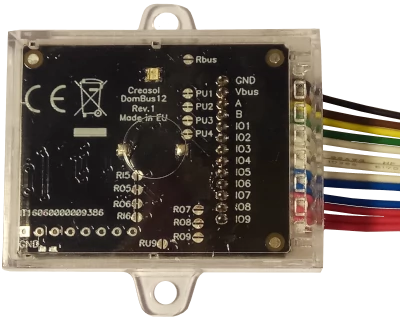 Very compact, versatile and cost-effective module with 9 ports. Each port can be configured by software as:
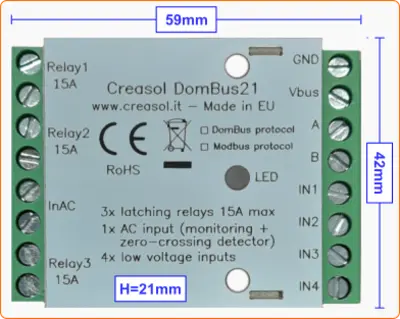 Very low power consumption module designed to enable up to 3 high power loads, up to 15A (3kW).
 Versatile module designed to control gate or garage door.
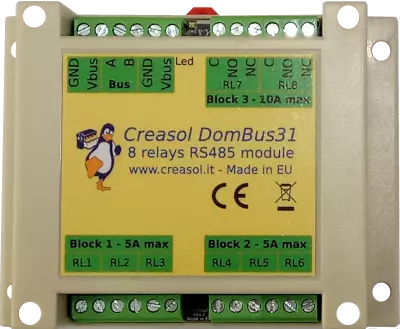 DIN rail low profile module, with 8 relays and very low power consumption:
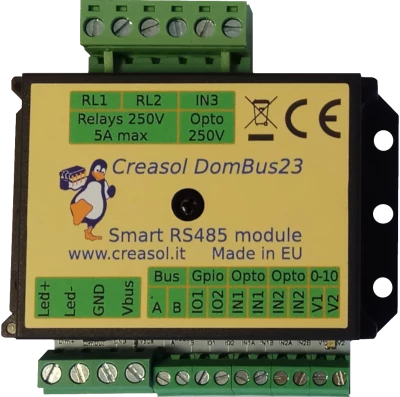
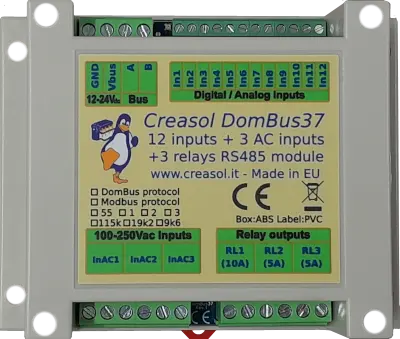
 Versatile module with 230V inputs and outputs, and 5 low voltage I/Os.
Module designed to control 3 lights already existing and actually controlled by 230V pushbuttons and step-by-step relays. In this way each light can be activated by existing pushbuttons, and by the domotic controller.
Each relay can toggle the existing step-relay, switching the light On/Off. The optoisolator monitors the light status. The 5 I/Os can be connected to pushbuttons to activate or deactivate one or all lights.
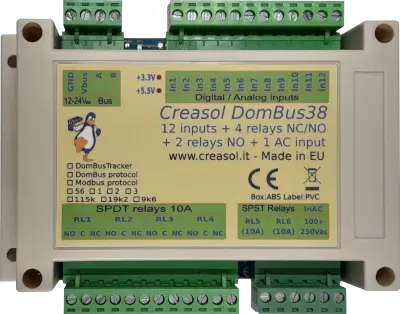
 DIN rail module, low profile, with 12 relays outputs and very low power consumption.
 Module designed to be connected to alarm sensors (magnetc contact sensors, PIRs, tampers): it's able to monitor mains power supply (power outage / blackout) and also have 3 relays outputs.
 DIN rail module designed for burglar alarm system.
![]() DIN rail module that control azimuth + elevation/tilt motors of a sun tracker, to maximize photovoltaic energy production during the day and seasons.
DIN rail module that control azimuth + elevation/tilt motors of a sun tracker, to maximize photovoltaic energy production during the day and seasons.
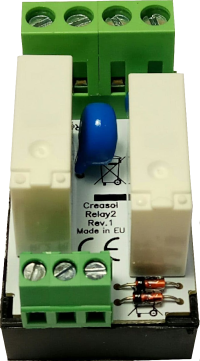 Simple module with 2 relays, to be used with DomBus modules or other electronic boards with open-collector or open-drain outputs
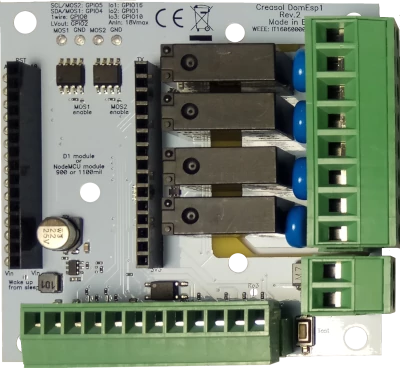 IoT board designed for NodeMCU v3 board using ESP8266 WiFi microcontroller
Deze garagedeur of poort opener werkt perfect en het aansluiten is een fluitje van een cent. Ik ga er binnenkort waarschijnlijk nog een bestellen!
Slimme wifi-opener op 2,4 GHz waarmee u uw garagedeur, poort of slagboom kunt openen en sluiten met uw smartphone, Android Auto, Google Home en Alexa.