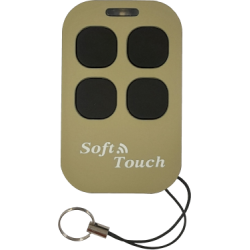
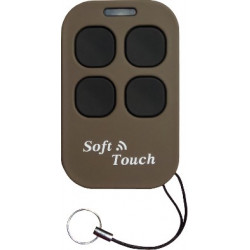
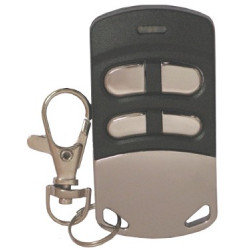
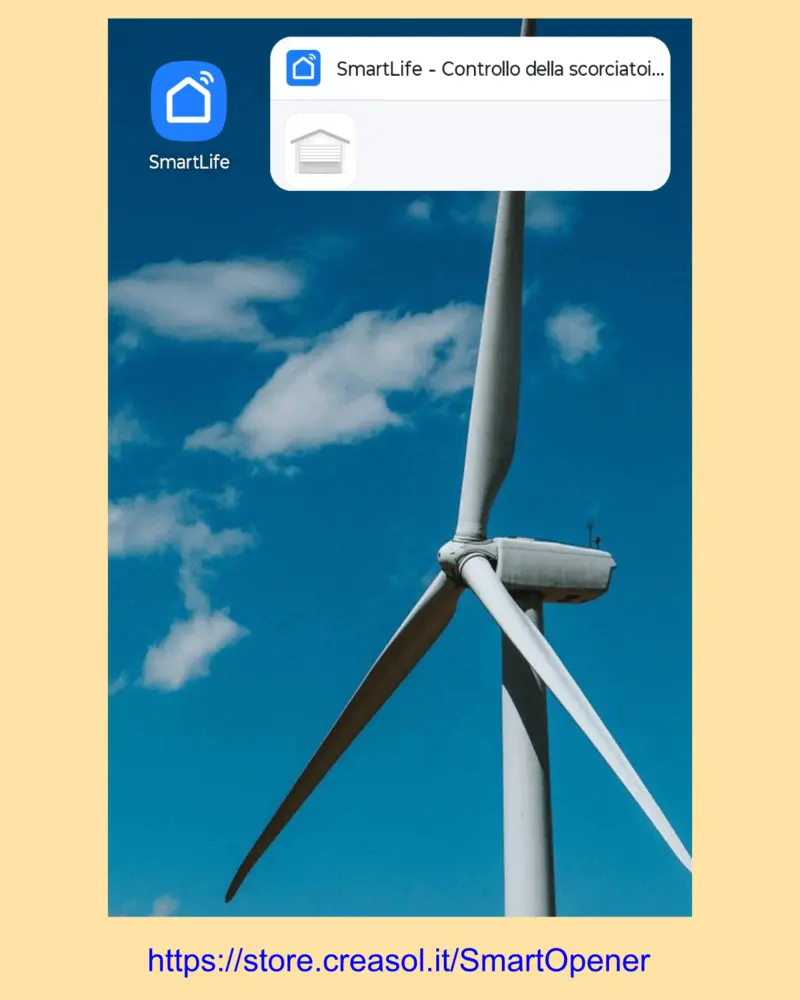
Smart WiFi 2.4GHz åbner, der gør det muligt at åbne og lukke din garageport, port eller trafikspærre via smartphone, Android Auto, Google Home og Alexa
Fuld support: de fleste produkter er designet af os!
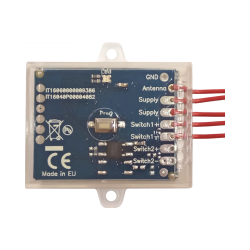
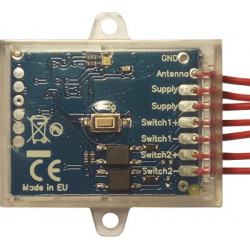
Meget kompakt WiFi-enhed, 39x39x23 mm, udstyret med en magnetisk sensor til at overvåge lukket status og en tør kontakt (relæ), der aktiveres i 0,5 sekunder for at åbne/lukke din garageport, port eller trafikbarrierer (nu kaldet "automatisering").
Den smarte åbner skal være forbundet til hjemmets WiFi-netværk: Så kan smartphonen åbne/lukke automatiseringen både via WiFi-netværket og internetadgang (skyen): på denne måde er det muligt at styre automatiseringen eksternt uden for WiFi-dækningsområdet./p>
Ingen cloud-omkostninger, ingen årlige gebyrer.
Installation
Vær forsigtig med elektricitet. Alle operationer skal udføres af teknikere!
Fjern strømforsyningen (110-230V) fra systemet.
Vælg en placering til enheden, hvor WiFi-signalet (2,4 GHz) er stærkt nok.
Tilslut eventuelt (men anbefales) den magnetiske sensor til S1- og S2-klemmerne. Om nødvendigt er det muligt at tilføje et ekstra kabel for at nå sensorens "lukkede position". Den magnetiske sensor består af to dele: en magnet, der skal installeres på den mobile del af automationen, og den aktive del med de to ledninger, der skal installeres i den faste del af automationen, så den kun parres med magneten, når automationen er lukket. Når automationen er lukket, skal magnet og sensor være perfekt parret med en afstand på maks. 1 cm.
Tilslut L1 og L2 til trykknappen, der bruges til at åbne/lukke automatiseringen, eller den tilsvarende indgang på det elektroniske printkort, der styrer than motorer.
Tilslut 110-230Vac til L- og N-klemmerne.
Aktiver strømforsyningen.
Tryk og slip KNAPPEN på enheden for at aktivere L1/L2-relæet og kontrollere, at automatikken åbner/lukker korrekt.
Nu kan automatiseringen styres af smartphonen og hjemmeautomationssystemer.
Styring af den smarte åbner med Smartlife eller Tuya-appen på smartphonen
Aktiver WiFi og Bluetooth på din smartphone, installer derefter applikationen "SmartLife" eller "Tuya" (de svarer til hinanden!) fra Play eller Apple Store, start derefter appen, registrer en ny konto (hvis du ikke har en) eller log ind med dit eksisterende brugernavn og din adgangskode.
Når du er logget ind, skal du trykke på + ikonet øverst til højre for at tilføje den smarte åbnerenhed
Tryk og hold KNAPPEN på den smarte åbner nede i mindst 10 sekunder: Om få sekunder vises et nyt ikon "Smart Garage Door" på skærmen: vælg det WiFi-netværk, der skal oprettes forbindelse til, og angiv den tilhørende adgangskode.
Med et langt TRYK på skærmen er det muligt at tilføje en SmartLife- eller Tuya-widget: i dette tilfælde er det muligt at aktivere den smarte åbner med et enkelt tryk uden at skulle åbne appen.
Styring af den smarte åbner via Android Auto
Opret en scene i SmartLife-appen for at åbne automatiseringen (port, garageport eller trafikbarriere).
Når smartphonen er parret med køretøjet, er det muligt at trykke på Apps-ikonet -> SmartLife -> Scenefor at åbne automatiseringen.
Det er selvfølgelig muligt at installere flere smarte åbnere til at åbne forskellige automatiseringer, for eksempel garageporte i dit hus, trafikbarrierer på arbejdspladsen, ...
Styring af den smarte åbner med Domoticz
Brug af plugin'et https://github.com/lacha07/domoticz-tuya-cloud Det er muligt at registrere sig i Tuya Cloud og få adgang til den smarte åbner, så den kan styres af Domoticz via browseren (på pc eller smartphone) og appen.
Følg instruktionerne i linket ovenfor for at registrere dig i Tuya API'en.
Styring af den smarte åbner med Home Assistant
Installer Tuya-integrationen, registrer dig i Tuya Cloud for at få en API-nøgle, og derefter kan du få adgang til de smarte åbnere fra Home Assistant.
Ofte stillede spørgsmål
Er en magnetisk sensor obligatorisk?
Nej, det er muligt at undgå at installere den magnetiske sensor: i dette tilfælde skal du deaktivere notifikationer for åben tilstand i SmartLife/Tuya-appen for at undgå advarsler om automationens åbne tilstand.
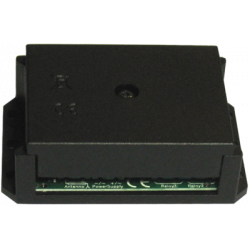
Kan jeg placere den smarte åbner i en DIN-skinneboks?
Ja, den har plastik Beslag til montering på DIN-skinne, optager 2,5 moduler (43 mm).
Smart-Home Creasol DomBus modules for Domoticz, Home Assistant, Node-RED, OpenHAB, ...
The following video shows a presentation of some domotic modules designed and produced in Italy by Creasol to make a reliable, easy and power-optimized home automation system.
The next video shows our Smart EVSE module that can be used to charge the electric car by using only solar power, or adding 25/50/75/100% of available power from the electrical grid.
Our industrial and home automation modules are designed to be
very low power (around 10mW with relays OFF)
reliable (no disconnections)
bus connected (no radiofrequency interference, no battery to replace).
Modules are available in two version:
with DomBus proprietary protocol, working with Domoticz only
For our products we can offer FULL SUPPORT and CUSTOMIZATION: please contact us by Email or Telegram
DomBusEVSE - EVSE module to build a Smart Wallbox / EV charging station
Complete solution to make a Smart EVSE, charging the electric vehicle using only energy from renewable source (photovoltaic, wind, ...), or adding 25-50-75-100% of available power from the grid.
Single-phase and three-phases, up to 36A (8kW or 22kW)
Needs external contactor, RCCB (protection) and EV cable
Optional power meter to measure charging power, energy, voltage and power factor
Optional power meter to measure the power usage from the grid (not needed if already exists)
Two max grid power thresholds can be programmed: for example, in Italy who have 6kW contractual power can drain from the grid Max (6* 1.27)=7.6kW for max 90 minutes followed by (6* 1.1)=6.6kW for another 90 minutes. The module can use ALL available power when programmed to charge at 100%.
Works without the domotic controller (stand-alone mode), and can also work with charging current set by the domotic controller (managed mode)
DomBusTH - Compact board to be placed on a blank cover, with temperature and humidity sensor and RGW LEDs
Compact board, 32x17mm, to be installed on blank cover with a 4mm hole in the middle, to exchange air for the relative humidity sensor. It can be installed in every room to monitor temperature and humidity, check alarm sensors, control blind motor UP/DOWN, send notifications (using red and green leds) and activate white led in case of power outage.
Includes:
temperature and relative humidity sensor
red, green and white LEDs
4 I/Os configurable as analog or digital inputs, pushbuttons, counters (water, gas, S0 energy, ...), NTC temperature and ultrasonic distance sensors
2 ports are configured by default as open-drain output and can drive up to 200mA led strip (with dimming function) or can be connected to the external module DomRelay2 to control 2 relays; they can also be configured as analog/digital inputs, pushbuttons and distance sensors.
DomBus12 - Compact domotic module with 9 I/Os
Very compact, versatile and cost-effective module with 9 ports. Each port can be configured by software as:
analog/digital inputs
pushbutton and UP/DOWN pushbutton
counters (water, gas, S0 energy, ...)
NTC temperature and ultrasonic distance sensors
2 ports are configured by default as open-drain output and can drive up to 200mA led strip (with dimming function) or can be connected to the external module DomRelay2 to control 2 relays.
DomBus21 - Power optimized module with 3 High Power latching relays, 1 AC input and 4 low voltage inputs
Very low power consumption module designed to enable up to 3 high power loads, up to 15A (3kW).
3x high power latching relays SPST 15A: latching relay consumes nothing when ON
1x 230V AC opto-isolated input used as power outage detector, and also as zero-crossing detector to permit switching relays On/Off minimizing in-rush current (for capacitive loads) and overvoltage (for inductive loads)
4x low voltage inputs, that can be connected to pushbuttons, switches, meters with pulsed output, NTC temperature sensors, ...
DomBus23 - Domotic module with many functions
Versatile module designed to control gate or garage door.
2x relays SPST 5A
1x 10A 30V mosfet (led stripe dimming)
2x 0-10V analog output: each one can be configured as open-drain output to control external relay
DIN rail low profile module, with 8 relays and very low power consumption:
6x relays SPST 5A
2x relays STDT 10A
Only 10mW power consumption with all relays OFF
Only 500mW power consumption with all 8 relays ON !!
DomBus32 - Domotic module with 3 relays
Versatile module with 230V inputs and outputs, and 5 low voltage I/Os.
3x relays SPST 5A
3x 115/230Vac optoisolated inputs
Single common for relays and AC inputs
5x general purpose I/O, each one configurable as analog/digital inputs, pushbutton, counter, temperature and distance sensor.
DomBus33 - Module to domotize a light system using step relays
Module designed to control 3 lights already existing and actually controlled by 230V pushbuttons and step-by-step relays. In this way each light can be activated by existing pushbuttons, and by the domotic controller.
3x relays SPST 5A
3x 115/230Vac optoisolated inputs
Single common for relays and AC inputs
5x general purpose I/O, each one configurable as analog/digital inputs, pushbutton, counter, temperature and distance sensor.
Each relay can toggle the existing step-relay, switching the light On/Off. The optoisolator monitors the light status. The 5 I/Os can be connected to pushbuttons to activate or deactivate one or all lights.
DomBus36 - Domotic module with 12 relays
DIN rail module, low profile, with 12 relays outputs and very low power consumption.
12x relays SPST 5A
Relays are grouped in 3 blocks, with a single common per block, for easier wiring
Only 12mW power consumption with all relays OFF
Only 750mW power consumption with all 12 relays ON !!
Module designed to be connected to alarm sensors (magnetc contact sensors, PIRs, tampers): it's able to monitor mains power supply (power outage / blackout) and also have 3 relays outputs.
12x low voltage inputs (analog/digital inputs, buttons, alarm sensors, balanced double/triple biased alarm sensors, counters, temperature and distance sensors, ...)
3x 115/230Vac optoisolated inputs
2x relays SPST 5A
1x relay SPST 10A
DomBus38 - 4 SPDT 10A relays, 2 SPST 10A relays, 1 AC input, 12 low voltage inputs
DIN rail module designed for burglar alarm system.
4x relays SPDT (normally open + close contacts), 10A
2x relays SPST 10A
1x 115/230Vac optoisolated inputs, that can be used to monitor 230V voltage presence (blackout detector) and it's also used as zero-crossing detector to minimize in-rush current and overvoltage when a relay switches On/Off
12x low voltage inputs (analog/digital inputs, buttons, alarm sensors, balanced double/triple biased alarm sensors, counters, temperature and distance sensors, ...)
DomBusTracker - Smart dual-axis sun tracker to optimize photovoltaic production
DIN rail module that control azimuth + elevation/tilt motors of a sun tracker, to maximize photovoltaic energy production during the day and seasons.
Uses a deep-hole sun sensor, to optimize production with both sunny and cloudy weather
Works in stand-alone mode (no need for external controller)
Can be connected to Domoticz for monitoring and controlling the motors position
DomRelay2 - 2x relays board
Simple module with 2 relays, to be used with DomBus modules or other electronic boards with open-collector or open-drain outputs
2x 5A 12V SPST relays (Normally Open contact)
Overvoltage protection (for inductive loads, like motors)
Overcurrent protection (for capacitive laods, like AC/DC power supply, LED bulbs, ...)
DomESP1 / DomESP2 - Board with relays and more for ESP8266 NodeMCU WiFi module
IoT board designed for NodeMCU v3 board using ESP8266 WiFi microcontroller
9-24V input voltage, with high efficiency DC/DC regulator with 5V output
4x SPST relays 5V with overvoltage protection
1x SSR output (max 40V output)
2x mosfet output (max 30V, 10A) for LED dimming or other DC loads
1x I²C interface for sensors, extended I/Os and more)
1x OneWire interface (DS18B20 or other 1wire sensors/devices)
Smart WiFi 2.4GHz åbner, der gør det muligt at åbne og lukke din garageport, port eller trafikspærre via smartphone, Android Auto, Google Home og Alexa


 Meget kompakt WiFi-enhed, 39x39x23 mm, udstyret med en magnetisk sensor til at overvåge lukket status og en tør kontakt (relæ), der aktiveres i 0,5 sekunder for at åbne/lukke din garageport, port eller trafikbarrierer (nu kaldet "automatisering").
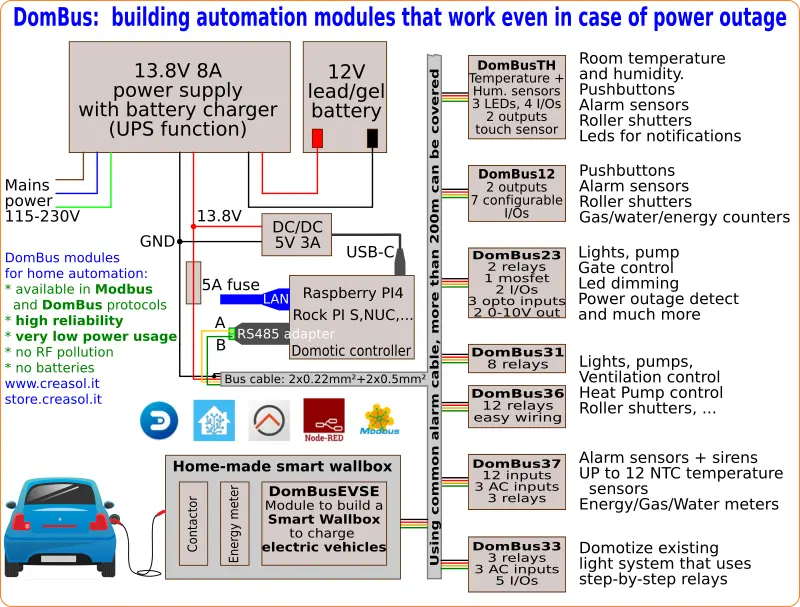
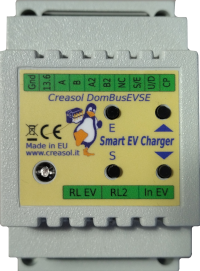 Complete solution to make a Smart EVSE, charging the electric vehicle using only energy from renewable source (photovoltaic, wind, ...), or adding 25-50-75-100% of available power from the grid.
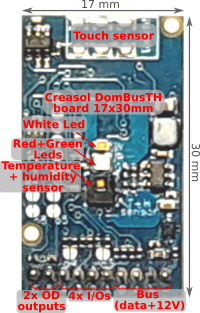 Compact board, 32x17mm, to be installed on blank cover with a 4mm hole in the middle, to exchange air for the relative humidity sensor. It can be installed in every room to monitor temperature and humidity, check alarm sensors, control blind motor UP/DOWN, send notifications (using red and green leds) and activate white led in case of power outage.
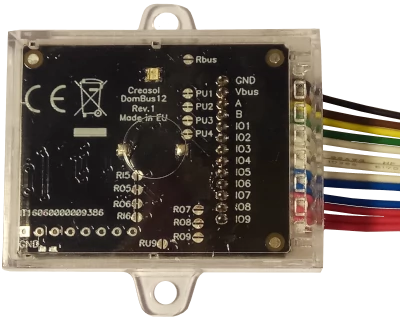 Very compact, versatile and cost-effective module with 9 ports. Each port can be configured by software as:
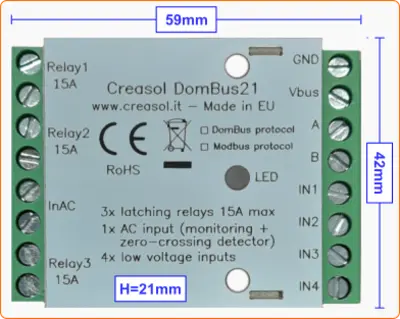 Very low power consumption module designed to enable up to 3 high power loads, up to 15A (3kW).
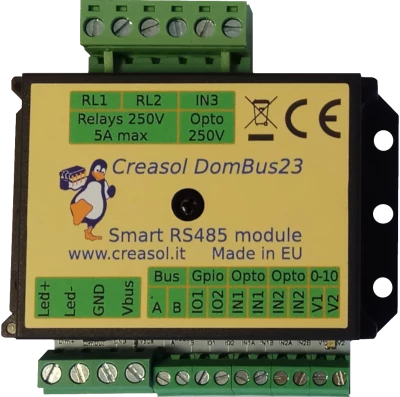 Versatile module designed to control gate or garage door.
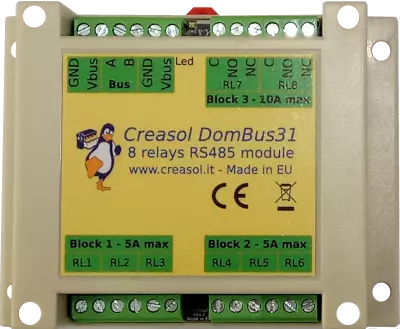 DIN rail low profile module, with 8 relays and very low power consumption:
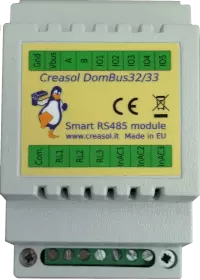 Versatile module with 230V inputs and outputs, and 5 low voltage I/Os.
 DIN rail module, low profile, with 12 relays outputs and very low power consumption.
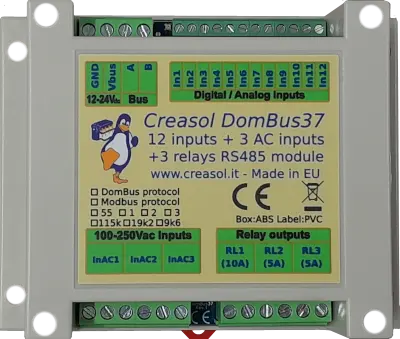 Module designed to be connected to alarm sensors (magnetc contact sensors, PIRs, tampers): it's able to monitor mains power supply (power outage / blackout) and also have 3 relays outputs.
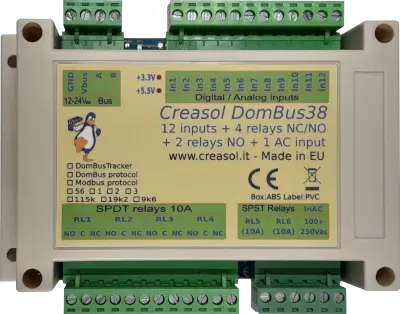 DIN rail module designed for burglar alarm system.
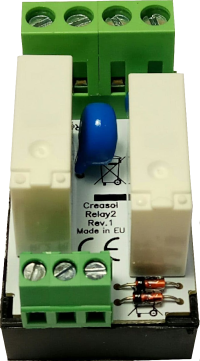 Simple module with 2 relays, to be used with DomBus modules or other electronic boards with open-collector or open-drain outputs
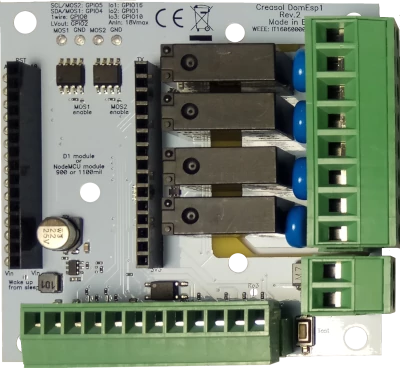 IoT board designed for NodeMCU v3 board using ESP8266 WiFi microcontroller