
- -32%

Email: store@creasol.it - Telegram: CreasolTech - Whatsapp: +393283730010

Priority Mail: schnell und günstig – Exp

Kontaktieren Sie uns, bevor Sie Produkte zur
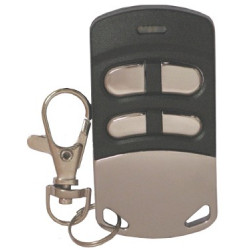
Intelligenter WLAN-Öffner (2,4 GHz), mit dem Sie Ihr Garagentor, Ihr Einfahrtstor oder Ihre Schranke per Smartphone, Android Auto, Google Home und Alexa öffnen und schließen können.
Volle Unterstützung: Die meisten Produkte werden von uns entworfen!
Email: store@creasol.it - Telegram: CreasolTech - Whatsapp: +393283730010
Bestellungen werden innerhalb eines Werktages versandt
Priority Mail: schnell und günstig – Exp
24 Monate Garantie, einfache Rückgabe/Rückerstattung
Kontaktieren Sie uns, bevor Sie Produkte zur
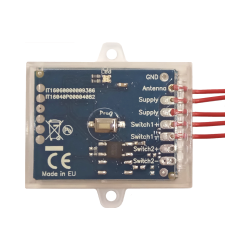
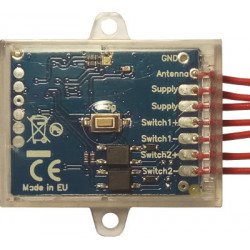
 Sehr kompaktes WiFi-Gerät, 39x39x23mm, ausgestattet mit einem Magnetsensor zur Überwachung des geschlossenen Zustands und einem potentialfreien Kontakt (Relais), der für 0,5s aktiviert wird, um Ihr Garagentor, Ihr Tor oder Ihre Verkehrsschranke zu öffnen/schließen (heute als „Automatisierung“ bezeichnet).
Der smarte Garagentoröffner muss mit dem heimischen WLAN-Netzwerk verbunden sein: Dann kann das Smartphone die Automatisierung sowohl über das WLAN-Netzwerk als auch über den Internetzugang (Cloud) öffnen/schließen: Auf diese Weise ist es möglich, die Automatisierung auch außerhalb der WLAN-Abdeckung fernzusteuern./p>
Keine Cloud-Kosten, keine Jahresgebühren.
Vorsicht im Umgang mit Elektrizität! Alle Arbeiten dürfen nur von Fachkräften durchgeführt werden!
Die Automatisierung kann nun über Smartphones und Hausautomationssysteme gesteuert werden.
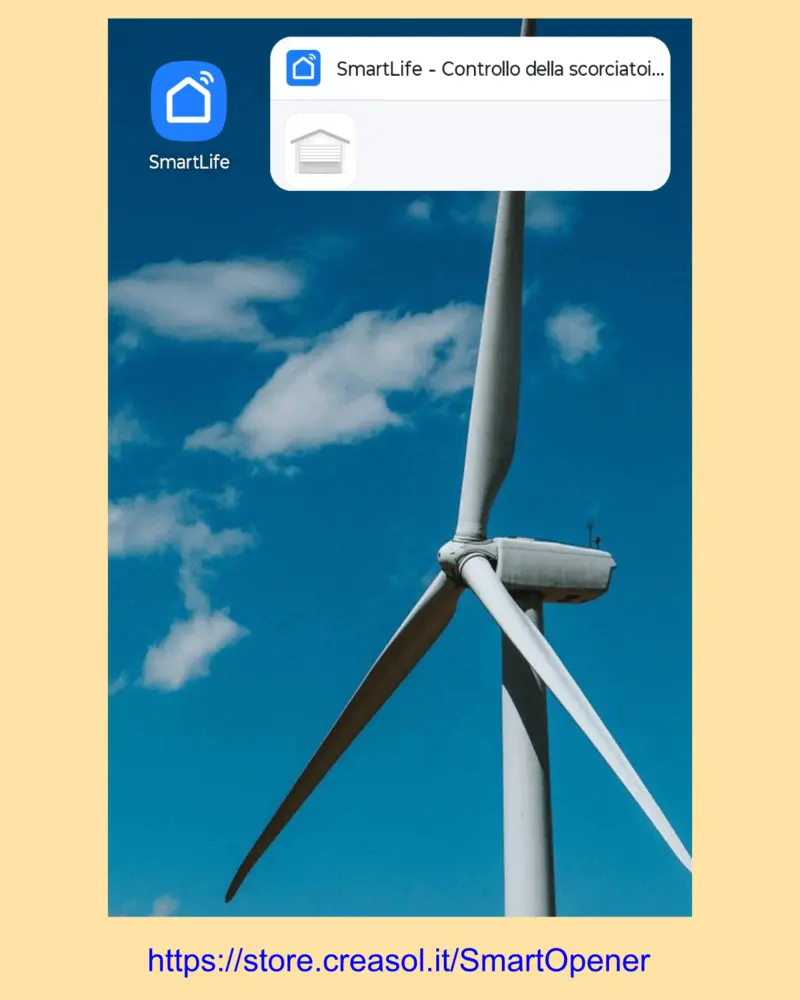
Erstellen Sie in der SmartLife-App eine Szene, um die Automatisierung (Tor, Garagentor oder Verkehrsschranke) zu öffnen.
Wenn das Smartphone mit dem Fahrzeug gekoppelt ist, kann man auf das App-Symbol tippen -> SmartLife -> Szeneum die Automatisierung zu öffnen.
Selbstverständlich können weitere intelligente Öffner installiert werden, um verschiedene Automatisierungen zu steuern, beispielsweise das Garagentor im Haus, die Schranke am Arbeitsplatz usw.
Verwendung des Plugins https://github.com/lacha07/domoticz-tuya-cloud Es besteht die Möglichkeit, sich in der Tuya-Cloud zu registrieren und so auf den intelligenten Garagentoröffner zuzugreifen, der dann über den Browser (auf dem PC oder Smartphone) und die App von Domoticz gesteuert werden kann.
Folgen Sie den Anweisungen im obigen Link, um sich bei der Tuya-API zu registrieren.
Installieren Sie die Tuya-Integration, registrieren Sie sich in der Tuya-Cloud, um einen API-Schlüssel zu erhalten, und Sie können dann über Home Assistant auf die intelligenten Garagentoröffner zugreifen.
Nein, es ist möglich, auf die Installation des Magnetsensors zu verzichten: In diesem Fall müssen Sie die Benachrichtigungen für den geöffneten Zustand in der SmartLife/Tuya-App deaktivieren, um Warnungen über den geöffneten Zustand der Automatisierung zu vermeiden.
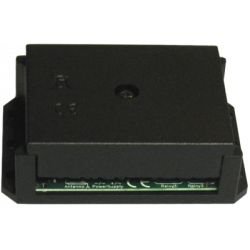
Ja, es hat ein Plastikgehäuse. Halterung zur Befestigung auf einer DIN-Schiene, die 2,5 Module (43 mm) belegt.
The following video shows a presentation of some domotic modules designed and produced in Italy by Creasol to make a reliable, easy and power-optimized home automation system.
The next video shows our Smart EVSE module that can be used to charge the electric car by using only solar power, or adding 25/50/75/100% of available power from the electrical grid.
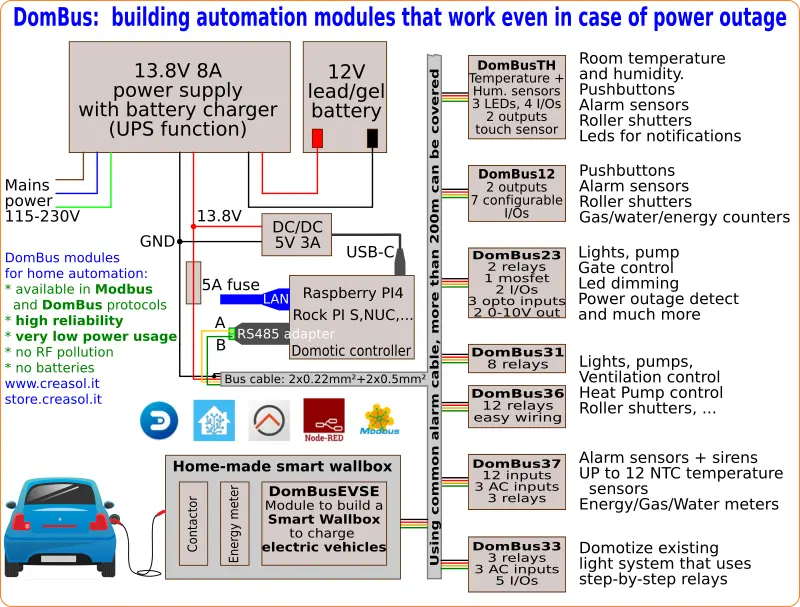
Our industrial and home automation modules are designed to be
Modules are available in two version:
Store website - Information website
For our products we can offer FULL SUPPORT and CUSTOMIZATION: please contact us by Email or Telegram
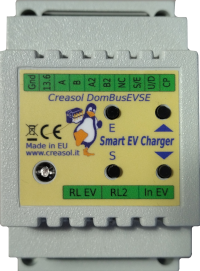 Complete solution to make a Smart EVSE, charging the electric vehicle using only energy from renewable source (photovoltaic, wind, ...), or adding 25-50-75-100% of available power from the grid.
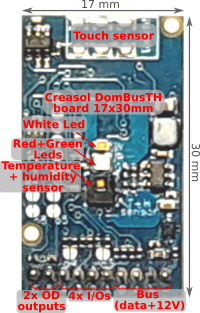 Compact board, 32x17mm, to be installed on blank cover with a 4mm hole in the middle, to exchange air for the relative humidity sensor. It can be installed in every room to monitor temperature and humidity, check alarm sensors, control blind motor UP/DOWN, send notifications (using red and green leds) and activate white led in case of power outage.
Includes:
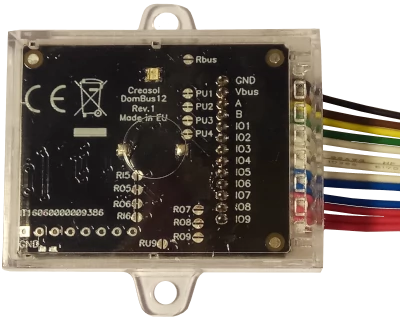 Very compact, versatile and cost-effective module with 9 ports. Each port can be configured by software as:
 Very low power consumption module designed to enable up to 3 high power loads, up to 15A (3kW).
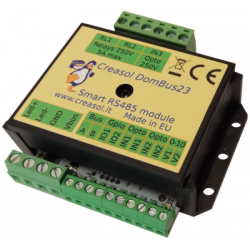
 Versatile module designed to control gate or garage door.
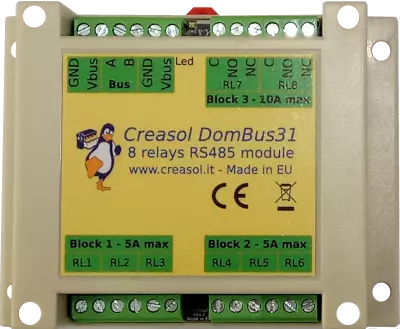 DIN rail low profile module, with 8 relays and very low power consumption:
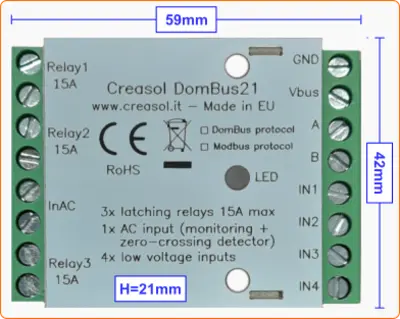
 Versatile module with 230V inputs and outputs, and 5 low voltage I/Os.
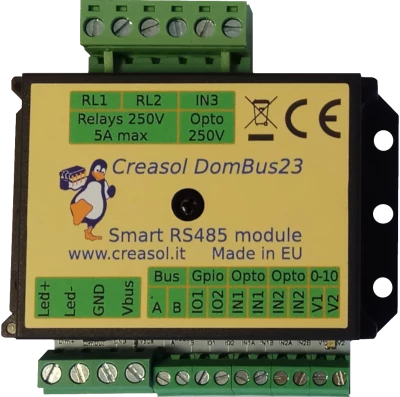
Module designed to control 3 lights already existing and actually controlled by 230V pushbuttons and step-by-step relays. In this way each light can be activated by existing pushbuttons, and by the domotic controller.
Each relay can toggle the existing step-relay, switching the light On/Off. The optoisolator monitors the light status. The 5 I/Os can be connected to pushbuttons to activate or deactivate one or all lights.
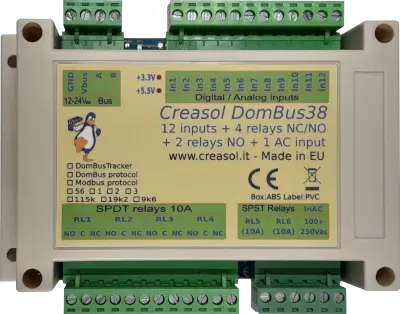
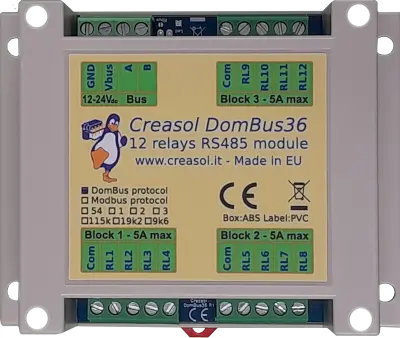 DIN rail module, low profile, with 12 relays outputs and very low power consumption.
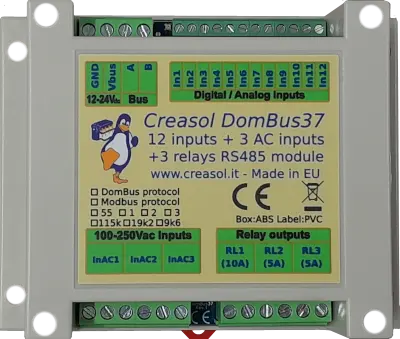 Module designed to be connected to alarm sensors (magnetc contact sensors, PIRs, tampers): it's able to monitor mains power supply (power outage / blackout) and also have 3 relays outputs.
 DIN rail module designed for burglar alarm system.
![]() DIN rail module that control azimuth + elevation/tilt motors of a sun tracker, to maximize photovoltaic energy production during the day and seasons.
DIN rail module that control azimuth + elevation/tilt motors of a sun tracker, to maximize photovoltaic energy production during the day and seasons.
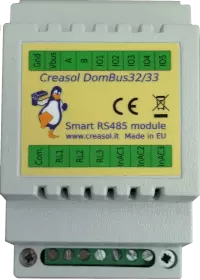
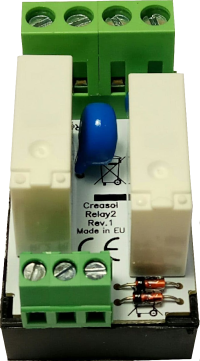 Simple module with 2 relays, to be used with DomBus modules or other electronic boards with open-collector or open-drain outputs
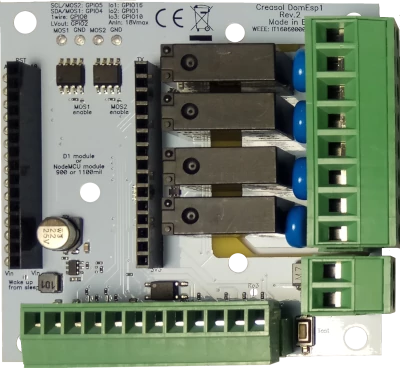 IoT board designed for NodeMCU v3 board using ESP8266 WiFi microcontroller
Deze garagedeur of poort opener werkt perfect en het aansluiten is een fluitje van een cent. Ik ga er binnenkort waarschijnlijk nog een bestellen!
Intelligenter WLAN-Öffner (2,4 GHz), mit dem Sie Ihr Garagentor, Ihr Einfahrtstor oder Ihre Schranke per Smartphone, Android Auto, Google Home und Alexa öffnen und schließen können.