- -32%

Email: store@creasol.it - Telegram: CreasolTech - Whatsapp: +393283730010

Correio prioritário: rápido e barato - Express Courie

Contate-nos antes de devolver produtos!
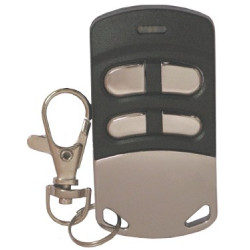
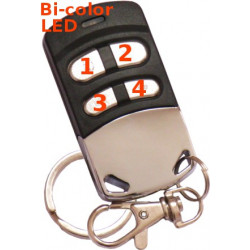
Abridor inteligente de Wi-Fi de 2,4 GHz que permite abrir e fechar a porta da garagem, portão ou cancela de trânsito por meio de smartphone, Android Auto, Google Home e Alexa.
Suporte total: a maioria dos produtos são projetados por nós!
Email: store@creasol.it - Telegram: CreasolTech - Whatsapp: +393283730010
Os pedidos são enviados em até 1 dia útil
Correio prioritário: rápido e barato - Express Courie
24 meses de garantia, fácil devolução/reembolso
Contate-nos antes de devolver produtos!
 Dispositivo Wi-Fi muito compacto, 39x39x23mm, equipado com um sensor magnético para monitorar o status de fechamento e um contato seco (relé) ativado por 0,5s para abrir/fechar a porta da garagem, portão ou cancela (agora chamado de "automação").
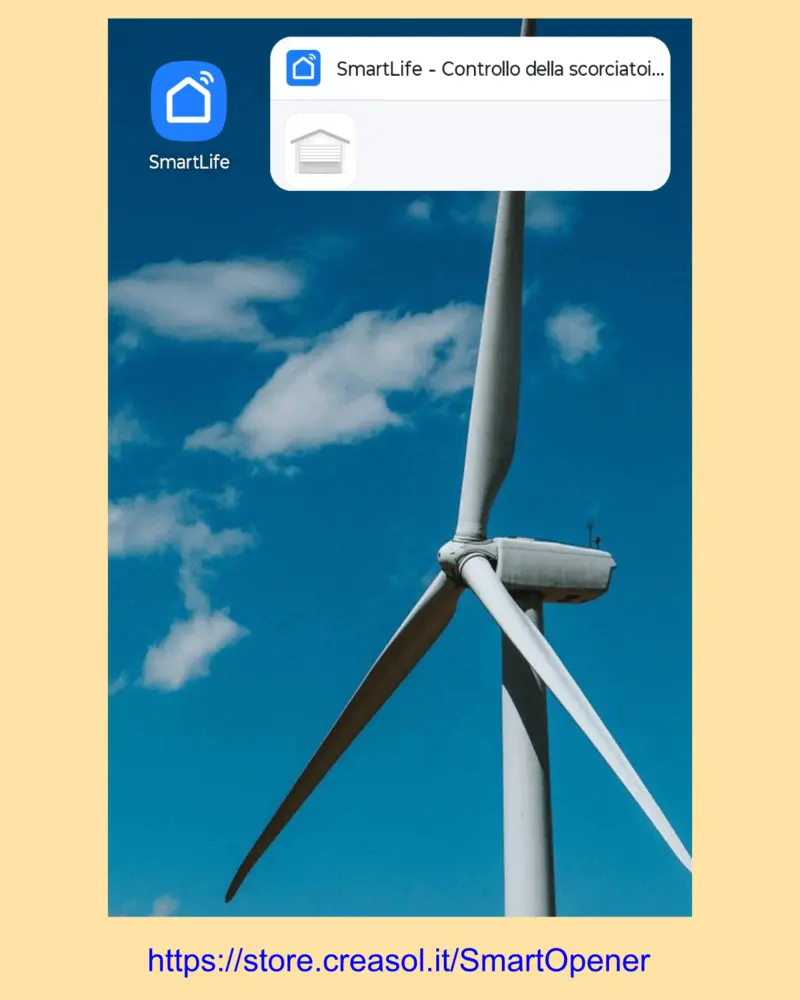
O abridor inteligente deve estar conectado à rede Wi-Fi doméstica: assim, o smartphone pode abrir/fechar a automação tanto pela rede Wi-Fi interna quanto pelo acesso à internet (nuvem): dessa forma, é possível gerenciar a automação remotamente, fora da área de cobertura do Wi-Fi./p>
Sem custos com nuvem, sem taxas anuais.
Tenha cuidado com a eletricidade. Todas as operações devem ser realizadas por técnicos!
Agora, a automação pode ser controlada por smartphone e sistemas de automação residencial.
No aplicativo SmartLife, crie uma cena para abrir a automação (portão, porta da garagem ou cancela de trânsito).
Quando o smartphone estiver emparelhado com o veículo, é possível tocar no ícone Aplicativos -> SmartLife -> Cena.para abrir a automação.
Claro, é possível instalar mais abridores inteligentes para acionar diferentes dispositivos automatizados, como a porta da garagem em sua casa, a cancela de trânsito no trabalho, etc.
Usando o plugin https://github.com/lacha07/domoticz-tuya-cloud É possível se cadastrar na nuvem Tuya, acessando o abridor inteligente para que ele possa ser controlado pelo Domoticz através do navegador (no PC ou smartphone) e do aplicativo.
Siga as instruções no link acima para se cadastrar na API da Tuya.
Instale a integração Tuya, registre-se na nuvem Tuya para obter uma chave de API e, em seguida, você poderá acessar os abridores inteligentes pelo Home Assistant.
Não, é possível evitar a instalação do sensor magnético: nesse caso, você precisa desativar as notificações de estado aberto no aplicativo SmartLife/Tuya para evitar avisos sobre o estado aberto da automação.
Sim, tem um revestimento de plástico. Suporte para fixação em trilho DIN, ocupando 2,5 módulos (43 mm).
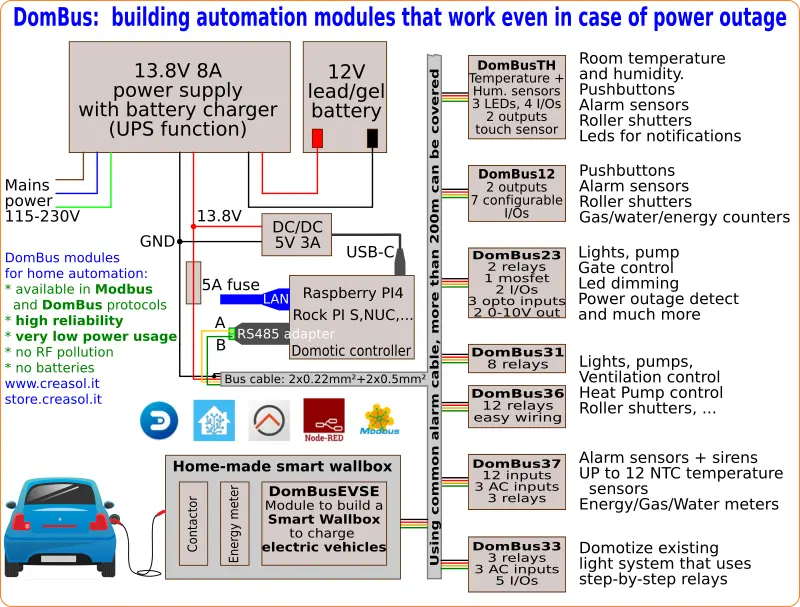
The following video shows a presentation of some domotic modules designed and produced in Italy by Creasol to make a reliable, easy and power-optimized home automation system.
The next video shows our Smart EVSE module that can be used to charge the electric car by using only solar power, or adding 25/50/75/100% of available power from the electrical grid.
Our industrial and home automation modules are designed to be
Modules are available in two version:
Store website - Information website
For our products we can offer FULL SUPPORT and CUSTOMIZATION: please contact us by Email or Telegram
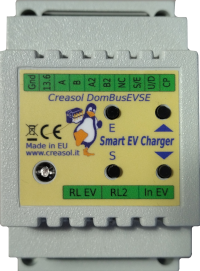 Complete solution to make a Smart EVSE, charging the electric vehicle using only energy from renewable source (photovoltaic, wind, ...), or adding 25-50-75-100% of available power from the grid.
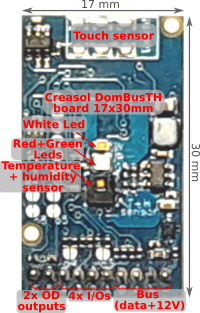 Compact board, 32x17mm, to be installed on blank cover with a 4mm hole in the middle, to exchange air for the relative humidity sensor. It can be installed in every room to monitor temperature and humidity, check alarm sensors, control blind motor UP/DOWN, send notifications (using red and green leds) and activate white led in case of power outage.
Includes:
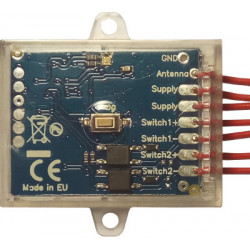
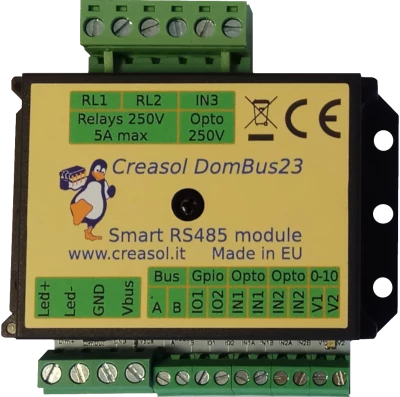
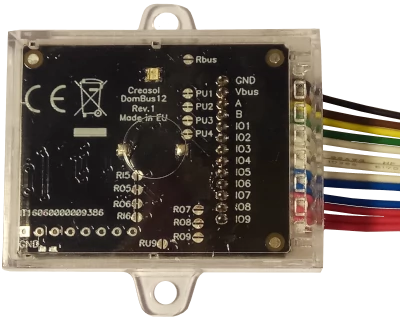 Very compact, versatile and cost-effective module with 9 ports. Each port can be configured by software as:
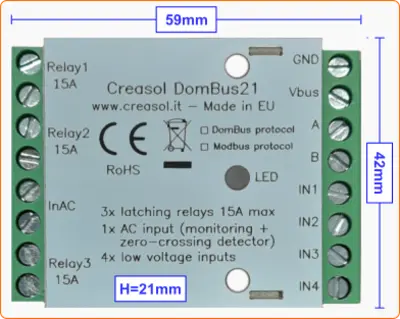 Very low power consumption module designed to enable up to 3 high power loads, up to 15A (3kW).
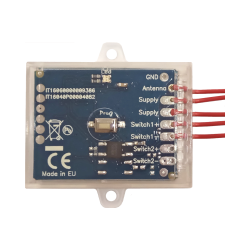
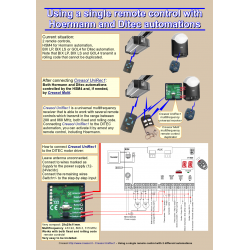
 Versatile module designed to control gate or garage door.
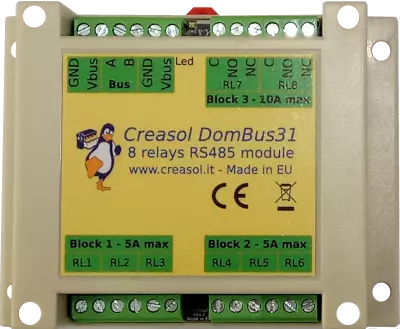 DIN rail low profile module, with 8 relays and very low power consumption:
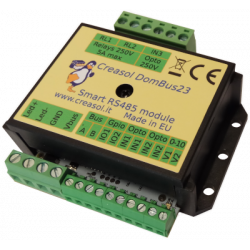
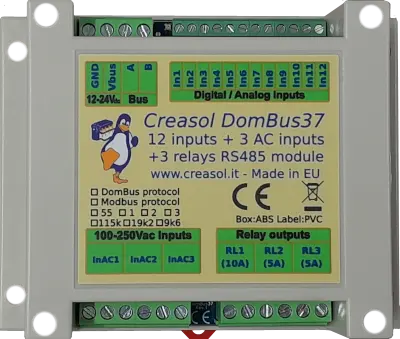
 Versatile module with 230V inputs and outputs, and 5 low voltage I/Os.
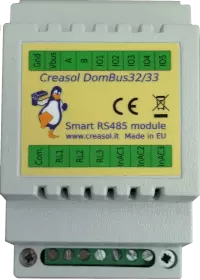
Module designed to control 3 lights already existing and actually controlled by 230V pushbuttons and step-by-step relays. In this way each light can be activated by existing pushbuttons, and by the domotic controller.
Each relay can toggle the existing step-relay, switching the light On/Off. The optoisolator monitors the light status. The 5 I/Os can be connected to pushbuttons to activate or deactivate one or all lights.
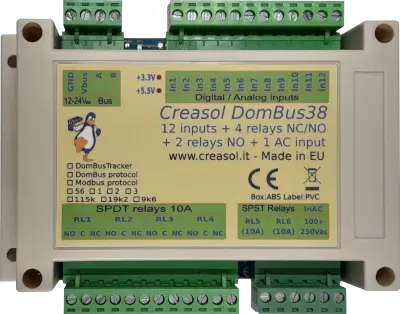
 DIN rail module, low profile, with 12 relays outputs and very low power consumption.
 Module designed to be connected to alarm sensors (magnetc contact sensors, PIRs, tampers): it's able to monitor mains power supply (power outage / blackout) and also have 3 relays outputs.
 DIN rail module designed for burglar alarm system.
![]() DIN rail module that control azimuth + elevation/tilt motors of a sun tracker, to maximize photovoltaic energy production during the day and seasons.
DIN rail module that control azimuth + elevation/tilt motors of a sun tracker, to maximize photovoltaic energy production during the day and seasons.
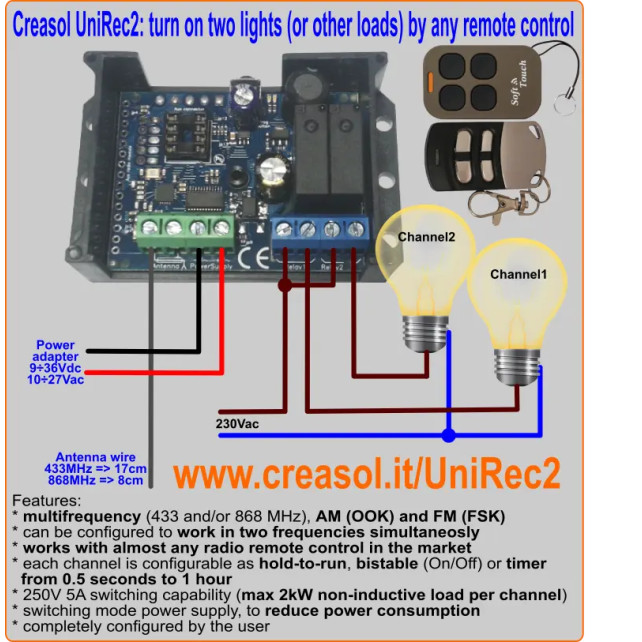
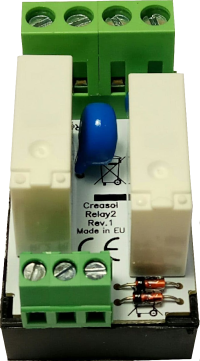 Simple module with 2 relays, to be used with DomBus modules or other electronic boards with open-collector or open-drain outputs
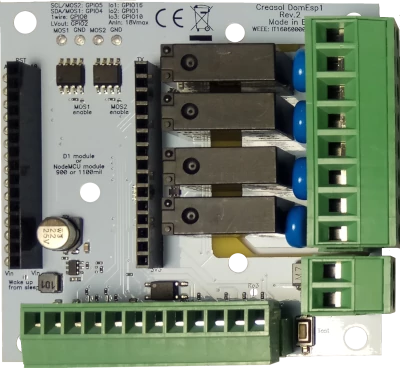 IoT board designed for NodeMCU v3 board using ESP8266 WiFi microcontroller
Deze garagedeur of poort opener werkt perfect en het aansluiten is een fluitje van een cent. Ik ga er binnenkort waarschijnlijk nog een bestellen!
Abridor inteligente de Wi-Fi de 2,4 GHz que permite abrir e fechar a porta da garagem, portão ou cancela de trânsito por meio de smartphone, Android Auto, Google Home e Alexa.